
How To Mermaid (Part 1) - A Guide to Planning a Mermaid Photoshoot
- Jul 29, 2019
- 7 min read

Welcome to my series of tutorials on HOW TO MERMAID. For the next 5 weeks, I will be showing you how to be your best mermaid this summer.
I decided to write about this article because I haven't really seen a lot of information regarding planning a mermaid shoot, so I decided to create this 5-part series that would not only help you plan a mermaid shoot, but go through a complete transformation - from the mermaid tail, crown and make-up.
Part 1 is Planning the Photo shoot.

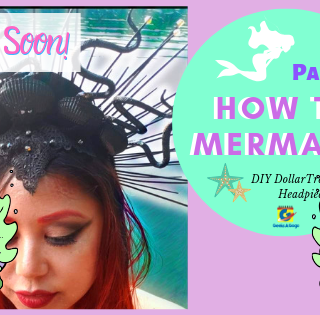
Part 2 - COMING SOON! August 5, 2019 - Mermaid Crown.

Part 3 - COMING SOON! August 12, 2019 - Mermaid Tail.


Part 4 - COMING SOON! August 19, 2019 Mermaid Makeup.

Part 5 - COMING SOON! August 26, 2019 - The Mermaid Photo Gallery


HOW TO PLAN A MERMAID PHOTOSHOOT

Pick an overall look
Search pinterest, instagram , etc. for inspiration for your mermaid look. My look was inspired by my buddy Shar Starr "The Queen of Chicago Cosplay Glam", and Liz, aka Rawsugar Cosplay suggested I take a goth inspired look for this one. I have recently dyed my hair this lovely bright orange and I knew it would be perfect because it would create a beautiful contrast I the water.

Buy all your costume items, accessories and props
The basics are pretty much - (from head to toe) Makeup, bikini top or any swimsuit top, tail (whether purchased or home made), and monofin. The monofin is important because it holds the shape of your fin. Plus, it will make it easy for you to swim around when it calls for it. I made my own tail and I will be doing a full post on a tutorial on how to make your own. So keep and eye out for it soon. Everything else is extra, but props, jewelry and head pieces really add a final touch to everything.
NOTE: Make sure to look out for my next 3 tutorials to complete your look! I'll be showing you how I made my Mermaid Crown using DollarTree items (Part 2), How I made my Mermaid Tail (Part 3), and How I created my Mermaid Hair and Make up.


In the mean time, here is my previous Mermaid Crown tutorial on our Youtube channel -

Make sure everything fits
When I bought my tail, I anticipated gaining a bit more weight since we're always eat more while on vacation. What I should have done was either stick to my original size or went 1 size smaller because when your tail and skin gets wet, it changes the way the tail fits your body. My tail fit perfectly on me when dry, and allowed for a bit of wiggle room. But once I got it all wet, it was quite slippery and it slid down a few times especially when I was swimming.

Practice how to put everything on and take it off in a dry AND wet
I can't stress this enough, especially when you're planning on swimming in the water. It takes quite a bit of getting used to before you can finally figure out how to work with your tail. Putting the tail on in the water was initially a huge mess because I wasn't used to how everything should slide, but after a few tries and after swimming for a few hours I was able to get a good technique going. The importance of this is not only to be prepared to pose or move around and be flexible on where to take the shots, but it will also save some time navigating during the shoot.

Find a photographer who is willing to shoot near the water and possibly get wet during the shoot, and also makes you feel comfortable during the shoot
Both you and the photographer may get cold during the shoot and you will end up being stuck in very uncomfortable poses just to "nail the shot". Amie and Cole did a fantastic job because during the shoot they knew when to block my eyes from the sun when it was too bright, and had me rest between takes when I had hard poses that required me to bend a little further than I'm used to. And of course since I am a bit insecure about my weight, Amie knew exactly how to direct my poses to let me know which ones work best to highlight my flattering parts. This really made me feel a lot more relaxed and it made the shoot way more enjoyable.

Pick a location and notify the photographer
The location was an easy part for my shoot since we have a family cabin that has a direct water front. And this year we ended up adding a dock, which was perfect because it made it easy for Amie to do some of the shots without getting into the water the entire time. The location also had a lot of interesting locations (continued below).
Here is the video version of the blog, with more commentary from the shoot

Survey the location for rocks, shallow and deep sections, trees, etc.
The water area of the cabin had a lot of interesting spots. We had a huge rock where I sat on during the shoot. And there's a shallow area with a sand bar, which was not far from smaller rock formations that I could sit on. There were also water plants that grew naturally around the water, so it created a beautiful, lagoon-like atmosphere. The trees surrounding it was reflected in the clear water and just added more interest and texture to the photos as well.

Work with the natural beauty of the surroundings and try not to damage or disturb the natural habitat
This is quite important. I really want to highlight this also because without the beauty of the surroundings you're working with, your shoot wouldn't look as good. When I was growing up, my grandparents had a private beach in the Philippines and we saw so many interesting sea creatures like hermit crabs, mud skippers, octopus, and starfish. The number one rule for being on the beach was to never disturb or harm the sea and its inhabitants and we respect the same rule when shooting in natural settings. Imagine if someone goes to your house and trashes everything - how would you feel? We're borrowing from nature. So it's best to take care of it.
Note: On my first experience, there wasn't a lot of shallow areas so I propped my midsection with a foot stool. this lifted my torso and butt area, but I still had to lift up my head and legs to make it "float" on water.

Start with the dry location first, then move on to the wet one
I curled my hair to have that tossed, beachy curls look but after my hair touched the water. It was pin straight again. You also want to seal your makeup really well. I sprayed my makeup 4 to 5 times with setting spray to create a barrier and used water proof eye liner and mascara. I did quite a bit of swimming during the shoot and my makeup was still ok after I swam around and dunked my head in the water.
Note: Part 4 will be all about my extensive makeup transformation

Always have a handler - for both photographer and cosplayer
Although I thought I was very well prepared for the shoot, there are always a few things that you would need help with. I needed my husband Bill's help to see if he can find a rock I can step on to be a bit more raised from the water during the shoot. He ended up doing some snorkeling to find it. Amie needed Cole's help to block some of the sun's glare during the shoot. And when I needed to crawl to a different location, they needed to hold my hair up so it wouldn't be wet. So many other things could happen that you don't anticipate. So it's better safe than sorry.

Have a cosplay emergency kit and makeup for touch ups ready
I needed a safety pin last minute to hold my tail in place. Luckily we had a kit available to fix the problem. Always have a kit and makeup on the ready to make adjustments between takes. It's better to get it done right the first time because water shoots can be difficult to schedule and re-shoots may not be possible.


Make sure to bring a towel, change of clothes, drinks and snacks
That's with any shoot, really, because there could be a few things that might require you to take breaks during the shoot. We were lucky the weather was not only pleasant, but the water was the perfect temperature, as well.

Always practice safety and have someone on the ready who knows how to administer first aid and CPR at all times in case of emergency
It doesn't matter if you're an experienced swimmer because sometimes things happen. You can get cramps or your tail could get caught on something during the shoot so it's better to just have someone on standby just in case.

Try to work during time of day where there is ample lighting
There were certain spots in the water that was already a bit dark even when there was light out. It will not only make it easy for you and your photographer to move around the location during the shoot, but ample lighting would also highlight all the great features of your costume, makeup and make your location look fantastic in photos.
Note from Amie on shooting close to dusk during the shoot: What we used for lighting was perfect for the mood we wanted to create. If the sun had been any higher in the sky, we wouldn't have achieved the lovely, even lighting that we were working with.


Don't forget to create a timeline for yourself and your photographer
Water shoots are very unpredictable, especially if you didn't practice wearing and putting your tail on and off. I also allotted 4 hours for getting my hair and makeup ready and I was right. Be mindful of your photographer's schedule and make sure that you also allot ample time for the shoot--especially when doing multiple shots.

Don't forget to follow my photographer and her assistant here:


Comments